
Does this The Sinking City 2 walkthrough spoil endings?
No. It is a spoiler-light chapter and area route. Ending flags, late plot objects, and the final fight stay off this page. A future endings article can gate those.

The Sinking City 2 walkthrough: spoiler-light chapter and area route from the first floodgate to later districts. Demo notes stay marked. Verified August 2026.
Spoiler-light opening route: first floodgate, Annex, church, crane. Full dump a98445OG4hY has no captions.
~13 min read
This The Sinking City 2 walkthrough is a spoiler-light chapter and area route for The Sinking City 2 from Frogwares — not an ending dump, not a 40-hour fake chapter list, and not a recap of Faye’s fate. You play Calvin Rafferty through flooded 1920s Arkham by foot and skiff. Chapter names below match published 1.0 writeups (GameSpew, 17 August 2026). Exact interior room pins stay TBA until logged. Demo videos can stop before Redemption Church. Steam · PS5 · Xbox Series X|S · Epic · GOG · Steam App 2825860. Verified August 19, 2026.
| Fact | Detail |
|---|---|
| Platform | Steam · PS5 · Xbox Series X|S · Epic · GOG |
| Genre | Survival horror · inventory scarcity |
| Mode | Single-player |
| Price | $49.99 Standard · Deluxe / Premium higher |
| Release | Released August 18, 2026 |
| Developer / Publisher | Frogwares / Frogwares |
| Steam | App 2825860 |
| This page | Spoiler-light chapter / area route — not endings, not every crate |
| Opening chapter | A New Day — house → flooded streets → first watergate → radio shop / first safe |
| Second chapter | The Wake-Up Call — Miskatonic Annex → Redemption Church → Silver Eel / Fire Dept / crane → Printing House → Devil’s Reef Hotel |
| Later chapters | A Sight For Sore Eyes (Akeley Hospital) · Time and Tide (Fish Market) · Cold Comfort (late route, no ending dump here) |
| Travel | Foot + skiff · rising flood changes layouts on return · unlock shortcuts and double back |
| Investigations | Optional — never story-gated; pay safer routes, supplies, upgrades |
| Demo | ~1 hour opening on Steam (from June 2026). Church / hotel may be absent. Codes: see puzzles |
| Part-1 footage | DMtT86QUgHs — full-game intro through church / crane (captions used) |
| Full dump video | a98445OG4hY — no subtitles at fetch; do not treat it as a caption source |
| Standalone | The Sinking City 1 not required |
| Last verified | August 19, 2026 |
The The Sinking City 2 walkthrough starts when Calvin leaves the opening house and the streets are already underwater — not when a fake “chapter 0” menu appears. Explore if you want, then ladder down to the flood, take the skiff, and drive until a watergate stops you. That gate is the first story lock. Opening chores (finite pack, dodge, weak points) sit on the beginner guide; this page only needs the order that gets the boat through.
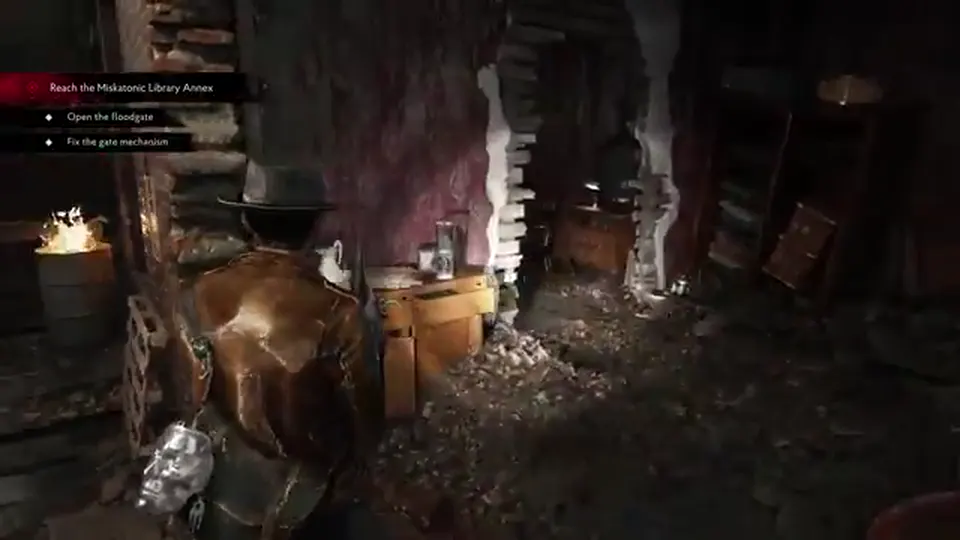
Part-1 footage calls the objective out loud: “open the floodgate.” The panel sits next to the lever. You need fuses from the electrical shop, not a year code. The first Safe Room is the symbol door beside that street — stash scrap there so the fuses fit. After the shop grab, enemies can spawn; the beginner tape’s advice still holds: weak points, or run. You get little for cleaning a street you will not revisit immediately.
Published chapter title: A New Day. After two gates and more skiff time you disembark at a red building and a scene fires. That is the hand-off into The Wake-Up Call, not a boss dump. If a demo walkthrough stops here, that is expected — the demo is about an hour. 1.0 keeps going to the Miskatonic annex behind the next water.
The Wake-Up Call is the first long Arkham loop on this The Sinking City 2 walkthrough: library annex, Redemption Church, a broken crane, the Printing House, then Devil’s Reef Hotel. You will boat, dock, walk a district, unlock a shortcut, and boat again. Puzzle answers for the church sit on puzzles. This heading only sequences the districts so you do not take the hotel boat before the church gate is open.
| Stop | Do this | Then |
|---|---|---|
| Miskatonic Library Annex | Cranks to open bookcases, Restricted Section pickup, meet Corentin (story NPC) | E.R.C. Activator Pen → crate for a pistol upgrade; leave by the window to the skiff |
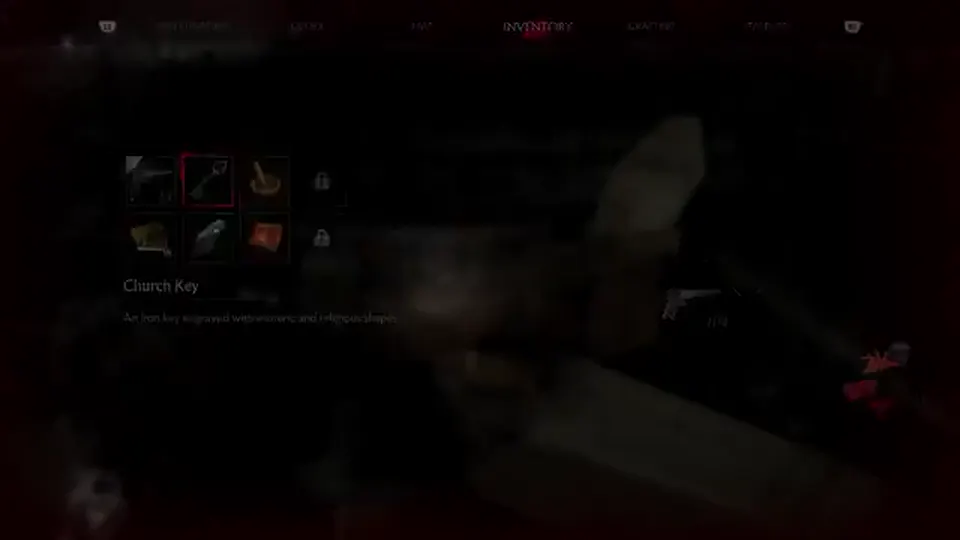
| Closed watergate before the church | Dock, walk the right-hand flooded path | Church key — do not empty the pack on every yard ambush |
| Redemption Church | Safe Room, Star Key, Trident, obelisk, floodgate 1672 | puzzles then skiff on |
| Crane / whale carcass | Silver Eel note + Graveyard key; Fire Department gas can; Printing House steel gear | Refuel, fit the gear, crane the blockage, optional apartment loot |
| Printing House (optional press) | Three printing plates; gold vs silver once per run (community-observed) | Not a story gate — stash and skip if the pack is tight |
| Devil’s Reef Hotel | Map, Safe Room, staff / Lorelei keys, basement vent puzzle, defend the transfer | Named fight at the dock — weak points, then boat the NPC back to the Annex |
The Miskatonic Library Annex sits behind the next water after A New Day. First floor has a map. Second floor is crank-and-bookcase routing — use the first crank, fall, climb, use the newly reachable crank, then the first crank again to reach the Restricted Section. Pick up the marked book, unjam the far door, continue until the Corentin scene. The Activator Pen near that scene opens an Annex crate for a pistol upgrade. Then window → boat → the church watergate. Skipping the Annex does not skip the church; it just skips the upgrade and the NPC hand-off this chapter wants.
Church key, Safe Room, Star Key, Trident, obelisk, 1672 floodgate — that whole yard is one stop. After the gate, the skiff dies at a crane that wants fuel and a gear. The Silver Eel has the Graveyard key and a Safe Room that can hand you a shotgun off a display. The Fire Department warehouse has the gas can behind an electrified puddle — kill power upstairs first, then expect a fight on the way out. The gear is behind A.P.H. key routing at the Printing House approach. Crane the whale, optionally loot the apartment the claw unblocks (Printing Plate B), then boat to Devil’s Reef Hotel when that watergate opens. Hotel interior keys and the basement vent are a local puzzle set; the corridor safe 2137 is optional — see puzzles.
Lorelei’s deal, Corentin’s research, and what the mask on the desk does after you return are story. This route only needs: finish the hotel transfer, survive the dock fight (shoot the legs, then the growths — community-observed), boat back to the Annex, interact with the desk when the game tells you to. Ending talk stays off this page and off a future spoiler-gated [endings] route.
Matched by build plan, shared topics, and guide progression — not random related links.
Google still suggests the sinking city 2 demo walkthrough. The Steam demo was a roughly one-hour opening slice from June 2026. It is useful for the first watergate, the first Safe Room, and the 1908 safe. It is a bad map for Redemption Church, the trident, and the hotel. 1.0 is the full Frogwares campaign that launched 18 August 2026. If your video never shows the churchyard obelisk, stop using it as a story route.
| Source | Use it for | Stop using it when |
|---|---|---|
| Steam demo / old demo videos | Pack habits, first gate, 1908 safe | The creator never reaches the Annex or church |
| DMtT86QUgHs (part 1, captions) | A New Day through church / crane on a 1.0 build | You need Hospital / Fish Market — that is a later VOD |
| a98445OG4hY (full dump) | Picture reference only | You need a quote — fetch returned no subtitles |
| LOFjCBUgtms (beginner) | Weak points, map colors, run away, perk swap in Safe Rooms | You need chapter order — it is not a walkthrough |
| This page | Spoiler-light 1.0 district order | You want ending flags — they are not here |
Frogwares may pull or keep the demo after launch — TBA, check Steam. This The Sinking City 2 walkthrough is written against 1.0 chapter names. If you are still on the demo, use the first-hour checklist only and ignore Wake-Up Call.
Every district on this route has at least one Safe Room: stash, craft, save, and (once unlocked) perk swap. The beginner tape is blunt — a typical shambler is too expensive to full-auto, map rooms turn blue when looted, and you can swap crafting perks at the desk then swap back to a fight kit. This walkthrough only adds when to sit down so you do not boat into a churchyard with two free slots and a Trident that needs two.
| Moment | Stop? | Why |
|---|---|---|
| First symbol-door Safe Room | Yes — always | Stash scrap so fuses and the optional 1908 loot fit |
| After the first fuse fight | Yes if bleeding | Soft drops help when you are empty; do not sightseeing-loot with a red health bar |
| Church Safe Room | Yes before the Trident | Trident is two slots; perks can come online here |
| Silver Eel / Fire Dept | Yes after the warehouse fight | Shotgun + gas can run fills the pack; stash before the crane |
| Hotel Safe Room | Yes before basement / dock fight | Named fight on the way out; ammo beats a full junk pack |
| Optional investigation crate | Only if the map is still red and you can spare the walk | Never a story gate — investigations |
| Street full of stragglers after you are done | No — run | Beginner footage: they often will not follow through a door |
The map is the route tool. Red means loot left behind. Blue means you can leave. You do not need every crate to open the next watergate. You do need a gate fuse, a church key, a Star Key, a charged Trident, crane fuel, and a crane gear — those are story items. Everything else is optional pressure on a finite pack.
Dream Essence from Investigation pairs and side rooms spends at the Safe Room table. A published beginner habit: slot a crafting perk, craft, then swap back to a combat perk before you leave. That is cheese and it is allowed. Full node names stay TBA on talents. This page only needs you to sit down before the Trident and before the hotel dock, not to min-max a fake tier list.
After you return to the Annex, the compact campaign opens into named districts you already saw on the store page: Akeley Memorial Hospital, the Fish Market, then a late cave / portal stretch. This The Sinking City 2 walkthrough will name the chapter and the job. It will not describe plot objects, ending flags, or a fake room-by-room platinum. Named creature pages stay on enemies.
| Chapter (published name) | District | Spoiler-light job | Hand off |
|---|---|---|---|
| A Sight For Sore Eyes | Akeley Memorial Hospital | Safe Room on entry; grab the wall map; route a device / prism job through color stations; expect a yard defense, then the skiff | locations · weapons |
| Time and Tide | Arkham Fish Market | Leyden Jars on starfish locks, Bolt Cutters on chains, Cold Storage key items, optional locker codes | puzzles · crafting |
| Time and Tide (end of chapter) | Market / warehouse fight space | First large named fight in published guides — devices then weak points, not a clip dump here | enemies |
| Cold Comfort | Late caves / columbarium / portal | Key items and a device-align puzzle; ending and final fight stay off this page | Future spoiler-gated endings page |
A Sight For Sore Eyes puts you in Akeley hospital. There is a Safe Room off reception. There is a map on a later wall — take it, unlock the shortcut back, then treat the colored stations as a fetch loop, not a lore essay. When the game opens a corridor, take it. When it drops you in a yard, defend until the barrier drops, then get back to water. Story images in that chapter are why this page stays spoiler-light.
Time and Tide is the Fish Market: starfish locks that eat Leyden Jars, chained doors that want Bolt Cutters, Cold Storage snowflake routing, and optional padlocks (symbol locker; numeric 1496 in published notes). Fill the story key chain, stash, then expect the chapter to end in a large named fight. Published tactics: activate local devices so weak points show, then shoot those — details belong on enemies, not in a spoiler walkthrough.
Cold Comfort is the late cave route: sturdy key, engraved pod, portal device. The last dock is an ending beat. This site will not print ending flags here. NG+ exists at launch (carry perk points / perks / items — exact rules TBA in-game). Trophy routing is the achievements page (23 Steam / GOG). If you came here for a platinum chapter table, you are on the wrong article.
No. It is a spoiler-light chapter and area route. Ending flags, late plot objects, and the final fight stay off this page. A future endings article can gate those.
Leave the house, take the skiff, open the first watergate with three fuses (I / T / L), optional 1908 safe, then boat to the red-building beat. That is A New Day. Opening combat habits are on the beginner guide.
No. The sequel is standalone. You play Calvin Rafferty, not Charles Reed. Single-player only — there is no co-op route.
Only for the first watergate and the 1908 safe. The Steam demo is about an hour. Redemption Church, the trident, and Devil’s Reef Hotel are 1.0. Apartment labels can differ.
No. It is a focused survival-horror campaign: foot plus skiff between districts, shortcuts, and flood layouts that change when you return. Not a TSC1-style open detective map.
Studio and community clear times are still TBA. Optional investigations, backtracking, and NG+ move the clock. This page will not invent a 40-hour table.
When the pack has space and a Safe Room is nearby. They never gate the main story. They pay safer routes, supplies, and upgrades. Skip them if you are already starving.
On the puzzles page: 1908 first safe, 1672 church floodgate, trident obelisk order. This walkthrough only says when you reach those locks.
Red rooms still have loot. Blue rooms are cleared. That habit is from beginner-guide footage and is the cheapest backtrack rule on this route.
The Wake-Up Call, after the Miskatonic Library Annex. Get the church key from the flooded yard path, then the Star Key, Trident, and 1672 floodgate.
Part 1 DMtT86QUgHs has captions through the church and crane. Full dump a98445OG4hY had no subtitles when fetched. LOFjCBUgtms is first-hour habits, not chapter order.
Locks: puzzles. First hours: beginner guide. Optional cases: investigations. District names: locations.
August 19, 2026
Matched by build plan, shared topics, and guide progression — not random related links.